Wirelurker For OSX, iOS (Part I) And Windows (Part II) Samples

Advertisement

PART II
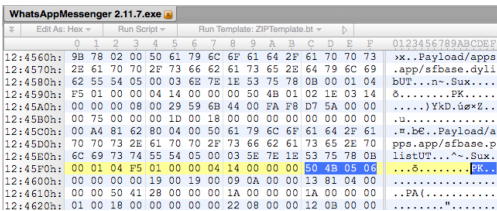
Wirelurker for Windows (WinLurker)

Research: Palo Alto Claud Xiao: Wirelurker for Windows

Sample credit: Claud Xiao


PART I


Research: Palo Alto Claud Xiao WIRELURKER: A New Era in iOS and OS X Malware

Palo Alto |Claud Xiao - blog post Wirelurker

Wirelurker Detector https://github.com/PaloAltoNetworks-BD/WireLurkerDetector


Sample credit: Claud Xiao


Download

Download Part I
Download Part II

Email me if you need the password


List of files
List of hashes 

Part II

s+«sìÜ 3.4.1.dmg 925cc497f207ec4dbcf8198a1b785dbd
apps.ipa 54d27da968c05d463ad3168285ec6097
WhatsAppMessenger 2.11.7.exe eca91fa7e7350a4d2880d341866adf35
使用说明.txt 3506a0c0199ed747b699ade765c0d0f8
libxml2.dll c86bebc3d50d7964378c15b27b1c2caa
libiconv-2_.dll 9c8170dc4a33631881120a467dc3e8f7
msvcr100.dll bf38660a9125935658cfa3e53fdc7d65
libz_.dll bd3d1f0a3eff8c4dd1e993f57185be75
mfc100u.dll f841f32ad816dbf130f10d86fab99b1a

zlib1.dll c7d4d685a0af2a09cbc21cb474358595


│   apps.ipa
│   σ╛«σìÜ 3.4.1.dmg

└───WhatsAppMessenger 2.11.7
            libiconv-2_.dll
            libxml2.dll
            libz_.dll
            mfc100u.dll
            msvcr100.dll
            WhatsAppMessenger 2.11.7.exe
            zlib1.dll
            使用说明.txt


Part I

BikeBaron 15e8728b410bfffde8d54651a6efd162
CleanApp c9841e34da270d94b35ae3f724160d5e
com.apple.MailServiceAgentHelper dca13b4ff64bcd6876c13bbb4a22f450
com.apple.appstore.PluginHelper c4264b9607a68de8b9bbbe30436f5f28
com.apple.appstore.plughelper.plist 94a933c449948514a3ce634663f9ccf8
com.apple.globalupdate.plist f92640bed6078075b508c9ffaa7f0a78
com.apple.itunesupdate.plist 83317c311caa225b17ac14d3d504387d
com.apple.machook_damon.plist 6507f0c41663f6d08f497ab41893d8d9
com.apple.MailServiceAgentHelper.plist e6e6a7845b4e00806da7d5e264eed72b
com.apple.periodic-dd-mm-yy.plist bda470f4568dae8cb12344a346a181d9
com.apple.systemkeychain-helper.plist fd7b1215f03ed1221065ee4508d41de3
com.apple.watchproc.plist af772d9cca45a13ca323f90e7d874c2c
FontMap1.cfg 204b4836a9944d0f19d6df8af3c009d5
foundation 0ff51cd5fe0f88f02213d6612b007a45
globalupdate 9037cf29ed485dae11e22955724a00e7
itunesupdate a8dfbd54da805d3c52afc521ab7b354b
libcrypto.1.0.0.dylib 4c5384d667215098badb4e850890127b
libcrypto.1.0.0.dylib 3b533eeb80ee14191893e9a73c017445
libiconv.2.dylib 94f9882f5db1883e7295b44c440eb44c
libiconv.2.dylib fac8ef9dabdb92806ea9b1fde43ad746
libimobiledevice.4.dylib c596adb32c143430240abbf5aff02bc0
libimobiledevice.4.dylib 5b0412e19ec0af5ce375b8ab5a0bc5db
libiodb.dylib bc3aa0142fb15ea65de7833d65a70e36
liblzma.5.dylib 5bdfd2a20123e0893ef59bd813b24105
liblzma.5.dylib 9ebf9c0d25e418c8d0bed2a335aac8bf
libplist.2.dylib 903cbde833c91b197283698b2400fc9b
libplist.2.dylib 109a09389abef9a9388de08f7021b4cf
libssl.1.0.0.dylib 49b937c9ff30a68a0f663828be7ea704
libssl.1.0.0.dylib ab09435c0358b102a5d08f34aae3c244
libusbmuxd.2.dylib e8e0663c7c9d843e0030b15e59eb6f52
libusbmuxd.2.dylib 9efb552097cf4a408ea3bab4aa2bc957
libxml2.2.dylib 34f14463f28d11bd0299f0d7a3985718
libxml2.2.dylib 95506f9240efb416443fcd6d82a024b9
libz.1.dylib 28ef588ba7919f751ae40719cf5cffc6
libz.1.dylib f2b19c7a58e303f0a159a44d08c6df63
libzip.2.dylib 2a42736c8eae3a4915bced2c6df50397
machook 5b43df4fac4cac52412126a6c604853c
machook ecb429951985837513fdf854e49d0682
periodicdate aa6fe189baa355a65e6aafac1e765f41
pphelper 2b79534f22a89f73d4bb45848659b59b
sfbase.dylib bc3aa0142fb15ea65de7833d65a70e36
sfbase_v4000.dylib 582fcd682f0f520e95af1d0713639864
sfbase_v4001.dylib e40de392c613cd2f9e1e93c6ffd05246
start e3a61139735301b866d8d109d715f102
start.sh 3fa4e5fec53dfc9fc88ced651aa858c6
stty5.11.pl dea26a823839b1b3a810d5e731d76aa2
systemkeychain-helper e03402006332a6e17c36e569178d2097
watch.sh 358c48414219fdbbbbcff90c97295dff
WatchProc a72fdbacfd5be14631437d0ab21ff960
7b9e685e89b8c7e11f554b05cdd6819a 7b9e685e89b8c7e11f554b05cdd6819a
update 93658b52b0f538c4f3e17fdf3860778c
start.sh 9adfd4344092826ca39bbc441a9eb96f

File listing

├───databases
│       foundation
├───dropped
│   ├───version_A
│   │   │   com.apple.globalupdate.plist
│   │   │   com.apple.machook_damon.plist
│   │   │   globalupdate
│   │   │   machook
│   │   │   sfbase.dylib
│   │   │   watch.sh
│   │   │
│   │   ├───dylib
│   │   │       libcrypto.1.0.0.dylib
│   │   │       libiconv.2.dylib
│   │   │       libimobiledevice.4.dylib
│   │   │       liblzma.5.dylib
│   │   │       libplist.2.dylib
│   │   │       libssl.1.0.0.dylib
│   │   │       libusbmuxd.2.dylib
│   │   │       libxml2.2.dylib
│   │   │       libz.1.dylib
│   │   │
│   │   ├───log
│   │   └───update
│   ├───version_B
│   │       com.apple.globalupdate.plist
│   │       com.apple.itunesupdate.plist
│   │       com.apple.machook_damon.plist
│   │       com.apple.watchproc.plist
│   │       globalupdate
│   │       itunesupdate
│   │       machook
│   │       start
│   │       WatchProc
│   │
│   └───version_C
│       │   com.apple.appstore.plughelper.plist
│       │   com.apple.appstore.PluginHelper
│       │   com.apple.MailServiceAgentHelper
│       │   com.apple.MailServiceAgentHelper.plist
│       │   com.apple.periodic-dd-mm-yy.plist
│       │   com.apple.systemkeychain-helper.plist
│       │   periodicdate
│       │   stty5.11.pl
│       │   systemkeychain-helper
│       │
│       └───manpath.d
│               libcrypto.1.0.0.dylib
│               libiconv.2.dylib
│               libimobiledevice.4.dylib
│               libiodb.dylib
│               liblzma.5.dylib
│               libplist.2.dylib
│               libssl.1.0.0.dylib
│               libusbmuxd.2.dylib
│               libxml2.2.dylib
│               libz.1.dylib
│               libzip.2.dylib
├───iOS
│       sfbase.dylib
│       sfbase_v4000.dylib
│       sfbase_v4001.dylib
│       start
│       stty5.11.pl
├───IPAs
│       7b9e685e89b8c7e11f554b05cdd6819a
│       pphelper
├───original
│       BikeBaron
│       CleanApp
│       FontMap1.cfg
│       start.sh
└───update
        start.sh
        update
More info
  1. Viral Hacking
  2. Hacking Aves
  3. Hacking Significado
  4. Hacking 101
  5. Sean Ellis Growth Hacking
  6. Libro De Hacking
  7. Tutoriales Hacking
  8. Best Hacking Books
  9. Curso De Hacking Etico
  10. Informatico Hacker
  11. Hacking Libro

Hacking All The Cars - Part 1

Advertisement

A step by step lab based mini course on analyzing your car network


I wanted to learn about hacking cars. As usual I searched around the internet and didn't find any comprehensive resources on how to do this, just bits and pieces of the same info over and over which is frustrating. I am not a car hacking expert, I just like to hack stuff. This mini course will run in a fully simulated lab environment available from open garages, which means in 5 minutes from now you can follow along and hack cars without ever bricking your girlfriends car. Since you obviously wouldn't attack your own Lambo, totally use your girlfriends Prius. 

Below are the topics covered in this blog  series so you can decide if you want to read further: 

Whats covered in this car hacking mini course: 

Setting up Virtual Environments for testing
Sniffing CAN Traffic
Parsing CAN Traffic
Reverse Engineering CAN IDs 
Denial of service attacks
Replaying/Injecting Traffic
Coding your own CAN Socket Tools in python
Targeted attacks against your cars components
Transitioning this to attacking a real car with hardware

The first thing we are going to do before we get into any car hacking specifics such as "WTF is CAN?", is get your lab up and running. We are going to run a simple simulated CAN Bus network which controls various features of your simulated car. Its better to learn by doing then sit here and recite a bunch of car network lingo at you and hope you remember it.  

I also don't want you to buy a bunch of hardware and jack into your real car right away. Instead there are options that can get you started hacking cars RIGHT NOW by following along with this tutorial. This will also serve to take away the fear of hacking your actual car by understanding what your doing first. 


Video Playlist: 


Setting up your Lab: 

First things first, set yourself up with an Ubuntu VMware install, and load it up. Optionally you could use a Kali Iinux VM, however, that thing drives me nuts with copy paste issues and I think Kayak was giving me install problems. So support is on you if you would like to use Kali. However, I do know Kali will work fine with OpenGarages virtual car.. So feel free to use it for that if you have it handy and want to get started right away. 


Install PreReq Libraries: 

Once you load this up you are going to want to install CAN utilities and pre-requisite libraries. This is really easy to do with the following Apt-get commands:
sudo apt-get update
sudo apt-get install libsdl2-dev libsdl2-image-dev can-utils  

Then we are going to pull down the ICSimulator repo: 


Starting the simulator: 

Once this is done we can startup the simulator by changing directories to the downloaded repo and running the following 2 commands, which will setup a virtual CAN interface and a simulator GUI Cluster: 

Run the setup Script to get the vcan0 interface up: 
root@kali:~/ICSim# ./setup_vcan.sh 
root@kali:~/ICSim# ./icsim vcan0

On a new terminal tab we will open up our simulators controller with the following command,
root@kali:~/ICSim#./controls vcan0

Note: that the controller must be the in-focus GUI screen to send keyboard commands to the simulator. 


How to Use the Simulator: 

The simulator has a speedometer with Right and Left turn signals, doors etc.  Below are the list of commands to control the simulator when the Control panel is in focus. Give them each a try and note the changes to the simulator. 
Up and Down keys control the gauges clusters speedometer
Left and Right keys Control the Blinkers
Right Shift + X, A or B open doors 
Left Shift + X, A or be Close doors

Try a few of the above commands for example Right Shift +X and you will see the interface change like so, notice the open door graphic: 


Awesome, thanks to OpenGarages you now you have your very own car to hack

Notice in the setup commands above we used a VCan0 interface. Run Ifconfig and you will now see that you indeed have a new network interface that speaks to the CAN network over VCan0. 

ficti0n@ubuntu:~/Desktop/ICSim$ ifconfig vcan0
vcan0     Link encap:UNSPEC  HWaddr 00-00-00-00-00-00-00-00-00-00-00-00-00-00-00-00  
          UP RUNNING NOARP  MTU:16  Metric:1
          RX packets:558904 errors:0 dropped:0 overruns:0 frame:0
          TX packets:558904 errors:0 dropped:0 overruns:0 carrier:0
          collisions:0 txqueuelen:1 
          RX bytes:3663935 (3.6 MB)  TX bytes:3663935 (3.6 MB)


Car networks run on a variety of protocols most prevalent being CAN. You can think of a CAN Bus like an old school networking hub where everyone can see everyone elses traffic. This is true to some extent although you may not see all of the cars traffic if its not connected to that particular bus your plugged into. You can think of CAN traffic kind of like UDP in that its send and forget, the main difference being parts of the CAN bus network don't actually have addresses and everything runs off arbitration IDs and priorities. Thats enough background to get you doing rather then reading.

With a little knowledge out of the way lets check if we can see our CAN traffic from our virtual car via the CanDump utility, which you installed as part of CanUtils package above. Using the following command on the vcan0 interface our simulator uses you can view a stream of traffic: 

ficti0n@ubuntu:~/Desktop/ICSim$ candump vcan0


Above we can see a bunch of CAN frames, and if we perform actions on the vehicle we will see changes to data values in the CanDump output.  However this may happen very fast, and we may not be able to see if for example we unlocked our simulators door. This is because things are changing constantly in the cars IDLE state. One single value changing may not stand out enough for us to take notice or may scroll so fast we cant see it. 


Capture and Replay CAN Actions: 

One option would be to perform an action and replay it, we should see the actions happen again in the replay if the traffic for the action we recorded is on the same bus network our device is plugged into. There are loads of networks within a car and its not guaranteed our network tap for example an OBD2 port plugin is connected to the same network as door we opened.  Or the door may not be connected to the network at all depending on your car and its age or how its configured. 

Replaying dumps with CanPlayer: 
Another useful tool included with CanUtils package is CanPlayer for replaying traffic. If the functionality we are trying to capture is on the same Bus as the adaptor plugged into the car, or in this case our Virtual CAN interface, we can use CanDump to save traffic to a file. We then use CanPlayer to replay the traffic on the network. For example lets run CanDump and open a door and then replay the functionality with CanPlayer. 

Lab 1 Steps: 

  1. Run CanDump
  2. Right Shift + X to open a door
  3. Cancel CanDump (ctrl+c)
  4. Left Shift + X to close the door
  5. Run can player with the saved dump and it will replay the traffic and open the door

Recording the door opening:  (-l for logging) 
ficti0n@ubuntu:~/Desktop/ICSim$ candump -l vcan0

Replaying the CanDump file:  (use the file your can dump created) 
ficti0n@ubuntu:~/Desktop/ICSim$ canplayer -I candump-2018-04-06_154441.log 

Nice, so if all went well you should see that your door is now open again. If this did not happen when attacking a real car, just try to replay it again. CAN networks are not like TCP/IP, they are more like UDP in that you send out your request and its not expecting a response. So if it gets lost then it gets lost and you have to resend. Perhaps something with higher priority on the network was sending at the time of your replay and your traffic was overshadowed by it.   


Interacting with the Can Bus and Reversing Traffic: 

So thats cool, but what about actually understanding what is going on with this traffic, CanDump is not very useful for this, is scrolls by to quickly for us to learn much from.  Instead we can use CanSniffer with colorized output to show us the bytes within packets that change. Below is an example of CanSniffer Traffic: 

To startup can sniffer run the following: 
ficti0n@ubuntu:~/Desktop/ICSim$ cansniffer -c vcan0


You will see 3 fields, Time, ID  and Data. Its pretty easy to figure out what these are based on thier name. The most important part for our usage in this blog are the ID and the Data fields.  

The ID field is the frame ID which is loosely associated with the device on the network which is effected by the frame being sent. The ID to also determines the priority of the frame on the network.  The lower the number of the CAN-ID the higher priority it has on the network and more likely it will be handled first.  The data field is the data being sent to change some parameter like unlocking a door or updating output. You will notice that some of the bytes are highlighted RED. The values in red are the values that are changing during the idle state you are currently in. 


Determine which ID and Byte controls the throttle: 

So with the terminal sniffing window open put the simulator and the controller into the foreground, with the controller being the window you have clicked and selected.  Pay attention to the CanSniffer output while hitting the UP ARROW and look for a value that was white but is now Red and increasing in value as the throttle goes up.  This might take you a few minutes of paying attention to whats going on to see. 

The following 2 pictures show ID 244 in the IDLE state followed by pressing the up button to increase the speed. You will notice a byte has turned red and is increasing in value through a range of HEX values 0-F. It will continue to enumerate through values till it reaches its max speed. 


The byte in ID 244 which is changing is the value while the throttle is engaged, so 244 associated in some way with the increasing speed.   The throttle speed is a good value to start with as it keeps increasing its value when pressed making it easier to spot while viewing the CanSniffer output.  


Singling out Values with Filters: 

If you would like to single out the throttle value then click the terminal window and press -000000 followed by the Enter key which will clear out all of the values scrolling. Then press +244 followed by the Enter key which will add back the throttle ID. You can now click the controller again and increase the speed with your Up arrow button without all the noise clouding your view.  You will instead as shown below only have ID 244 in your output: 


To get back all of the IDs again click the terminal window and input +000000 followed by the Enter key.   Now you should see all of the output as before.  Essentially 000000 means include everything. But when you put a minus in front of it then it negates everything and clears your terminal window filtering out all values. 


Determine Blinker ID: 

Now lets figure out another ID for the blinkers. If you hit the left or right arrow with the controls window selected you will notice a whole new ID appears in the list, ID 188 shown in the picture below which is associated with the blinker. 


This ID was not listed before as it was not in use within the data output until you pressed the blinker control.  Lets single this value out by pressing -000000 followed by +188.  Just like in the throttle example your terminal should only show ID 188, initially it will show with 00 byte values. 

 As you press the left and the right blinker you will see the first Byte change from 00 to 01 or 02. If neither is pressed as in the screenshot above it will be 00. Its kind of hard to have the controller in focus and get a screenshot at the same time but the ID will remain visible as 00 until it times out and disappears from the list when not active. However with it filtered out as above you can get a better view of things and it wont disappear.  


Time for YOU to do some Protocol Reversing:

This lab will give you a good idea how to reverse all of the functionality of the car and associate each action with the proper ID and BYTE. This way you can create a map of intended functionality changes you wish to make.  Above we have done a few walk throughs with you on how to determine which byte and ID is associated with an action. Now its time to map everything out yourself with all the remaining functionality before moving on to attacking individual components.  


Lab Work Suggestion: 


  1. Take out a piece of paper and a pencil
  2. Try unlocking and locking doors and write down the ID which controls this action (remember your filters)
  3. Try unlocking each door and write down the BYTES needed for each door to open
  4. Try locking each doors and what Bytes change and what are their values, write them down
  5. Do the same thing for the blinkers left and right (Might be different then what I did above) 
  6. What ID is the speedometer using?  What byte changes the speed? 


Attacking Functionality Directly: 

With all of the functionality mapped out we can now try to target various devices in the network directly without interacting with the controllers GUI. Maybe we broke into the car via cellular OnStar connection  or the center console units BLE connection which was connected to the CAN network in some way.  
After an exploit we have direct access to the CAN network and we would like to perform actions. Or maybe you have installed a wireless device into an OBD2 port under the dashboard you have remote access to the automobile. 

Using the data from the CAN network reversing lab above we can call these actions directly with the proper CAN-ID and Byte.  Since we are remote to the target we can't just reach over and grab the steering wheel or hit the throttle we will instead send your CAN frame to make the change.
One way we can do this is via the CanSend utility. Lets take our information from our lab above and make the left turn signal flash with the following ID 188 for the turn signal by changing the first byte to 01 indicating the left signal is pressed. CanSend uses the format ID#Data. You will see this below when sending the turn signal via CanSend. 

ficti0n@ubuntu:~/Desktop/ICSim$ cansend vcan0 188#01000000 


You should have noticed that the left signal flashed. If not pay more attention and give it another try or make sure you used the correct ID and changed the correct byte.  So lets do the same thing with the throttle and try to set the speed to something with ID 244 that we determined was the throttle. 

ficti0n@ubuntu:~/Desktop/ICSim$ cansend vcan0 244#00000011F6 

My guess is that nothing happened because its so fast the needle is not going to jump to that value. So instead lets try repeating this over and over again with a bash loop which simply says that while True keep sending the throttle value of 11 which equates to about 30mph: 

ficti0n@ubuntu:~/Desktop/ICSim$ while true; do cansend vcan0 244#00000011F6;  done


Yes thats much better, you may notice the needle jumping back and forth a bit. The reason the needle is bouncing back and forth is because the normal CAN traffic is sent telling the car its actually set to 00 in between your frames saying its 30mph.  But it worked and you have now changed the speed the car sees and you have flashed the blinker without using the cars normal blinker controls. Pretty cool right? 


Monitor the CAN Bus and react to it: 

Another way to handle this issue is to monitor the CAN network and when it sees an ID sent it will automatically send the corresponding ID with a different value.. Lets give that a try to modify our speed output by monitoring for changes. Below we are simply running CanDump and parsing for ID 244 in the log output which is the throttle value that tells the car the speed. When a device in the car reports ID 244 and its value we will immediately resend our own value saying the speed is 30mph with the value 11.  See below command and try this out. 

ficti0n@ubuntu:~/Desktop/ICSim$ candump vcan0 | grep " 244 " | while read line; do cansend vcan0 244#00000011F6; done

With this running after a few seconds you will see the speed adjust to around 30MPH once it captures a legitimate CAN-ID 244 from the network traffic and sends its own value right after.  

Ok cool, so now while the above command is still running click the controller window and start holding down the Up arrow with the controller in focus.. After a few seconds or so when the speed gets above 30MPH you will see the needle fighting for the real higher value and adjusting back to 30MPH as your command keeps sending its on value as a replacement to the real speed. 

So thats one way of monitoring the network and reacting to what you see in a very crude manner.  Maybe someone stole your car and you want to monitor for an open door and if they try to open the door it immediately locks them in. 


Conclusion and whats next: 

I am not an expert car hacker but I hope you enjoyed this. Thats about as far as I want to go into this subject today, in the next blog we will get into how to code python to perform actions on the CAN network to manipulate things in a similar way.  With your own code you are not limited to the functionality of the tools you are provided and can do whatever you want. This is much more powerful then just using the CanUtils pre defined tools. Later on I will also get into the hardware side of things if you would like to try this on a real car where things are more complicated and things can go wrong. 

Read more

How To Create Fake Email Address Within Seconds

Advertisement
How To Create Fake Email Address Within Seconds

How To Create Fake Email Address Within Seconds

Email address is a type of identification by which an email receiver identifies the person who sends mail to him/her. That's why while creating an email address you need to enter your personal details that must be valid. However, what if we tell you that you can create an email address that doesn't require any validation of personal details and that email address gets permanently deleted after your work is done. So here we have a method To Create Fake Email Address. By this, you can create a fake email address that will get auto-deleted after ten minutes. Just follow the below steps to proceed.

Note:  The method we are discussing is just for a known purpose and should not be used for any illegal purposes, as we will be not responsible for any wrongdoing.

How To Create Fake Email Address Within Seconds

The method of creating a fake email address is very simple and easy as these are based on online websites that will provide you a free email address without taking any personal details from you.

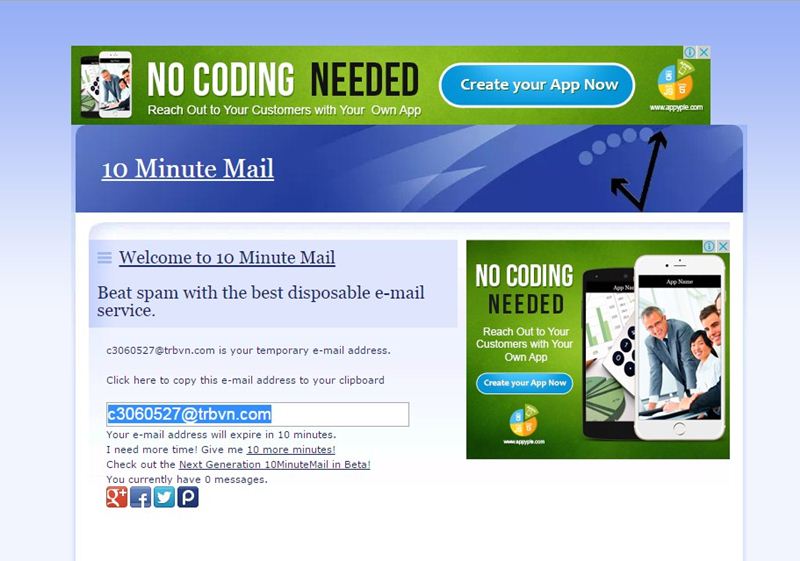
#1 10 Minute Mail

10 Minute Mail
10 Minute Mail
10 Minute Mail will provide you a temporary e-mail address. Any e-mails sent to that address will show automatically on the web page. You can read them, click on links, and even reply to them. The email address will expire after 10 minutes.

#2 GuerrillaMail

Guerrillamail
Guerrillamail
It is one of the most user-friendly ones out there, with this, you can get disposable email ID easily. You need to enter the details, and the fake email ID will be generated. Moreover, this also lets you send emails with attachment up to 150MB. You will be provided with a temporary email address which you can use to verify some websites which require the email address.

#3 Mailinator

Mailinator
Mailinator
Mailinator is a free, Public, Email System where you can use any inbox you want. You will be given a Mailinator address which you can use anytime a website asks for an email address. The public emails you will receive will be auto-deleted after few hours of receiving.

#4 MailDrop

MailDrop
MailDrop
Maildrop is a great idea when you want to sign up for a website but you are concerned that they might share your address with advertisers. MailDrop is powered by some of the spam filters created by Heluna, used in order to block almost all spam attempts before they even get to your MailDrop inbox. This works the same way like Mailinator in which you will be given a temporary Email address which you can use to verify sites etc.

#5 AirMail

AirMail
AirMail
AirMail is a free temporary email service, you are given a random email address you can use when registering to new websites or test-driving untrusted services. All emails received by AirMail servers are displayed automatically in your online browser inbox.
Related links

Arsip Blog

Copyright © 2009 - - Kiamat | Coin Free Faucet Claim | Firebug Theme by Blog Oh! Blog | Converted to Blogger Template by ThemeLib.com | Jasa Promosi Online - Tukar Link Gratis